Every Little War Review Part 2: Yu Jing Holo Echoes

Hello Everyone!

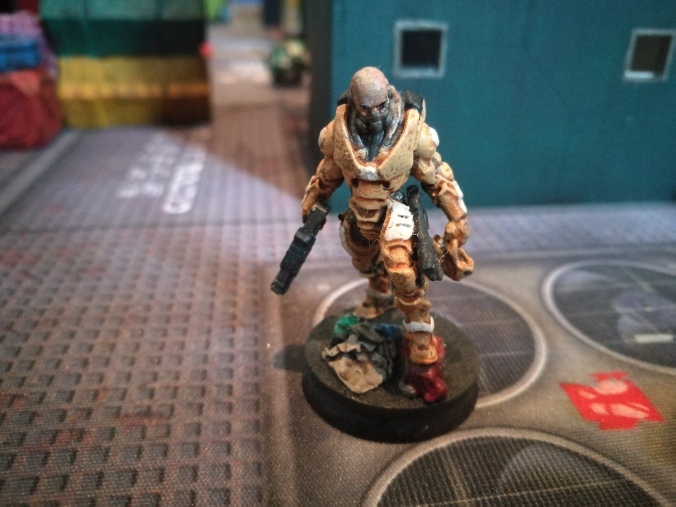
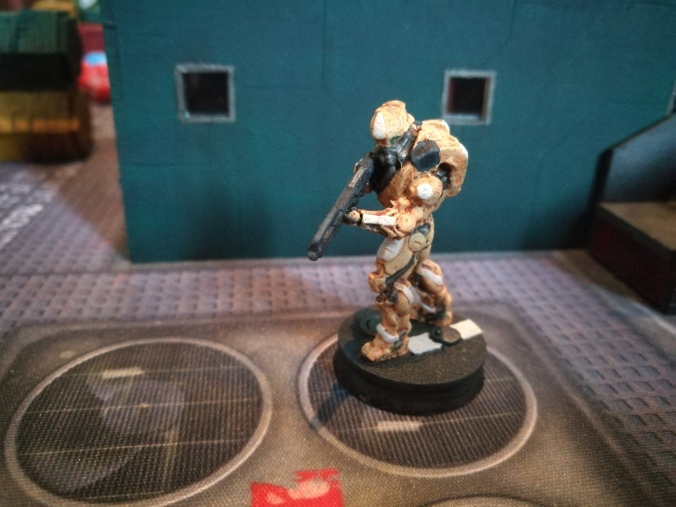
This is part 2 of my Review of the new Silhouettes from Every Little War ( https://everylittlewar.com/ )., and I am taking a look at the Yu Jing Holo Echoes that where sent to me!

Since my last Review they have put up their Silhouettes on their Website as well, so for everyone interested you can take a look at them right here:

https://everylittlewar.com/collections/newest/products/n3-contour-silhouettes-yu-jing

The package I got didn’t include Father Sforza since he’s actually a mercenary, but after checking on their website I have seen that they now have added him to the Set as well, so if you should order the complete set, you should have him included as well. Sadly though this means that I can’t show you any personal Images of him here, since I don’t have him.

Once again let it be mentioned that Every Little War produces in and ships from America, and that all Silhouettes mentioned in my Review where created by Osman Naskali.

As you can see on their website they now also offer Silhouettes for several other factions like for example PanO, Combined Army or Aleph.

Anyways, on to the Review!

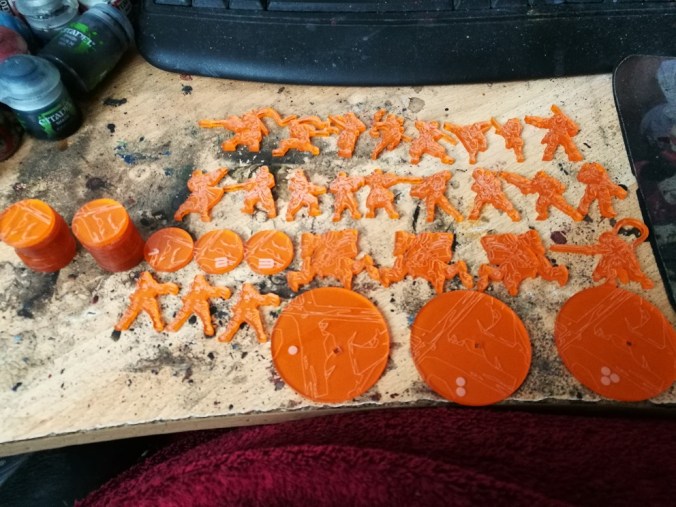
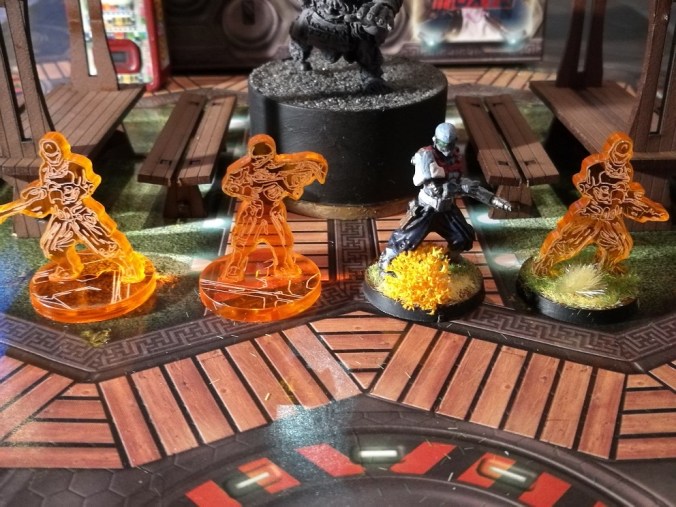
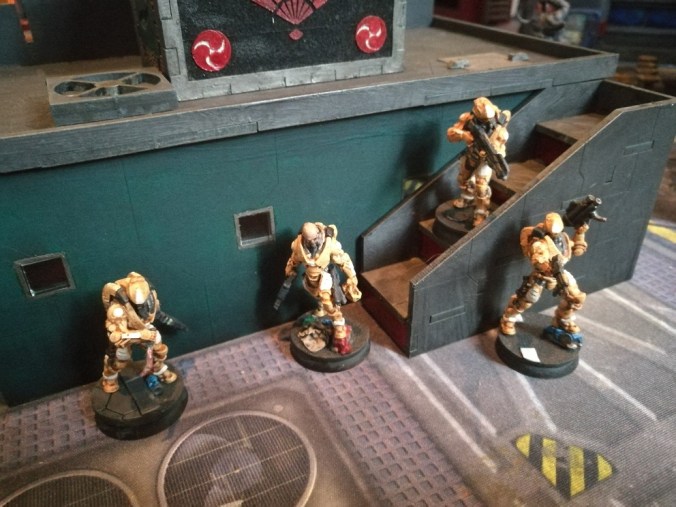
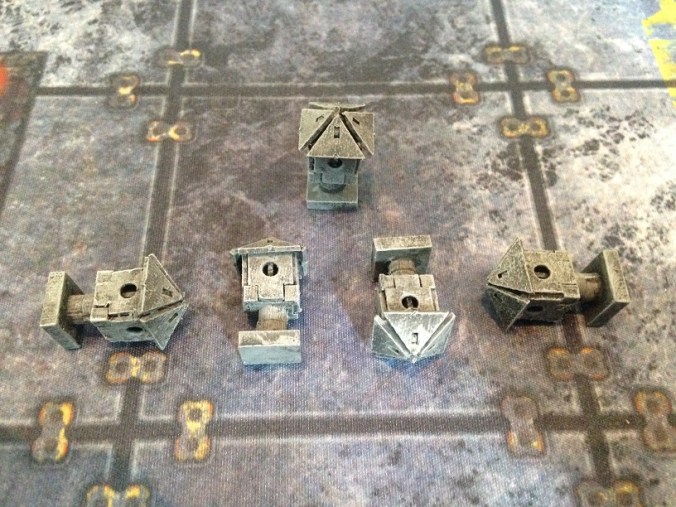
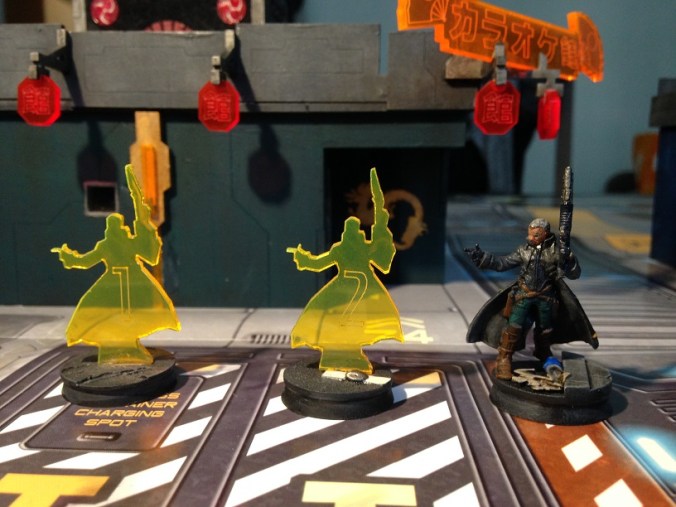
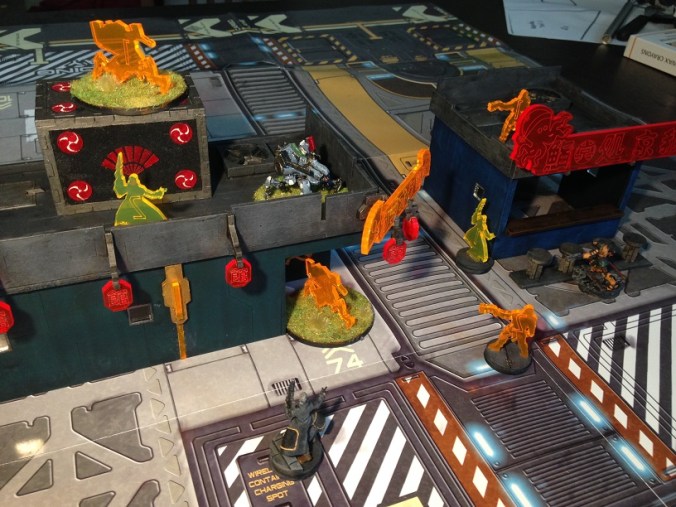
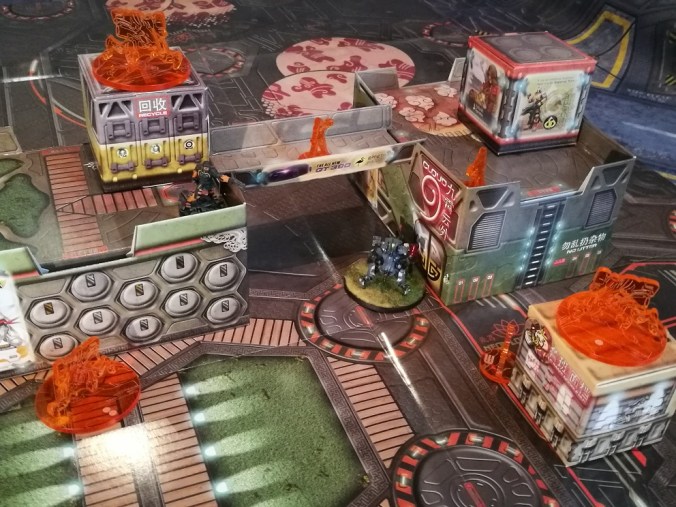
The Holo Echoes come in sets of 3 Holo Echoes per Figure, which allows you to filter out the psychological factor of “I’m sure he’s going to be the real model, because it’s just so damn beautiful”…which can be both an advantage and a disadvantages, depending on whether you do that or not ;-P

IMG_20160928_173207.jpg

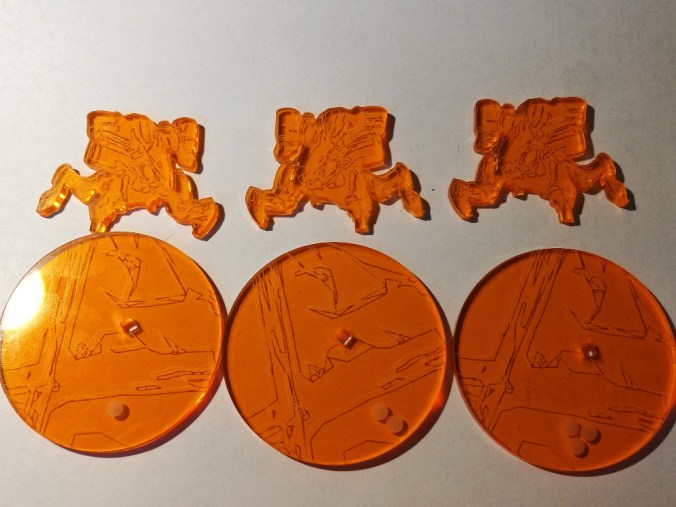
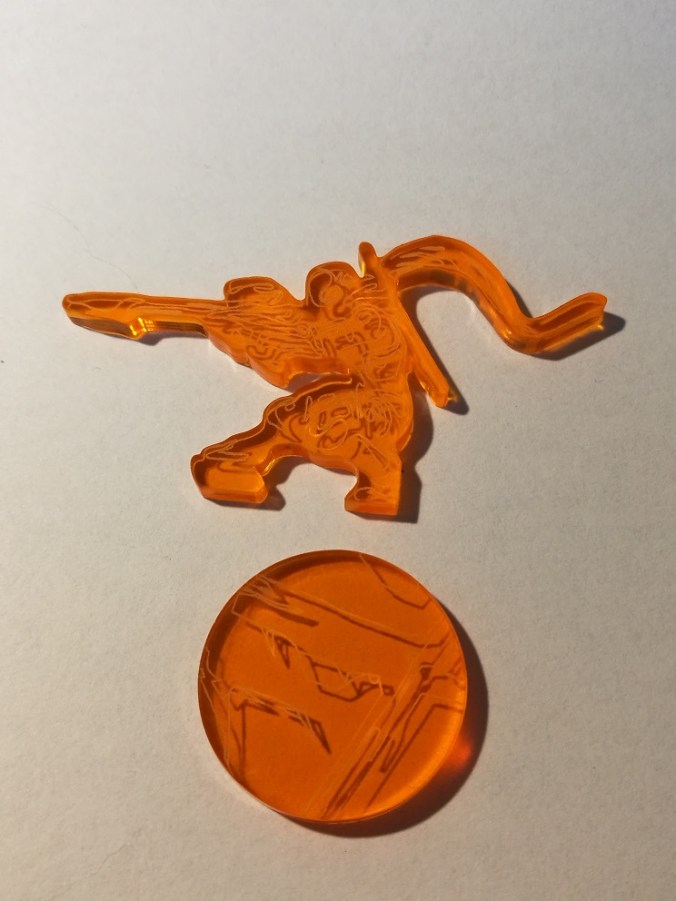
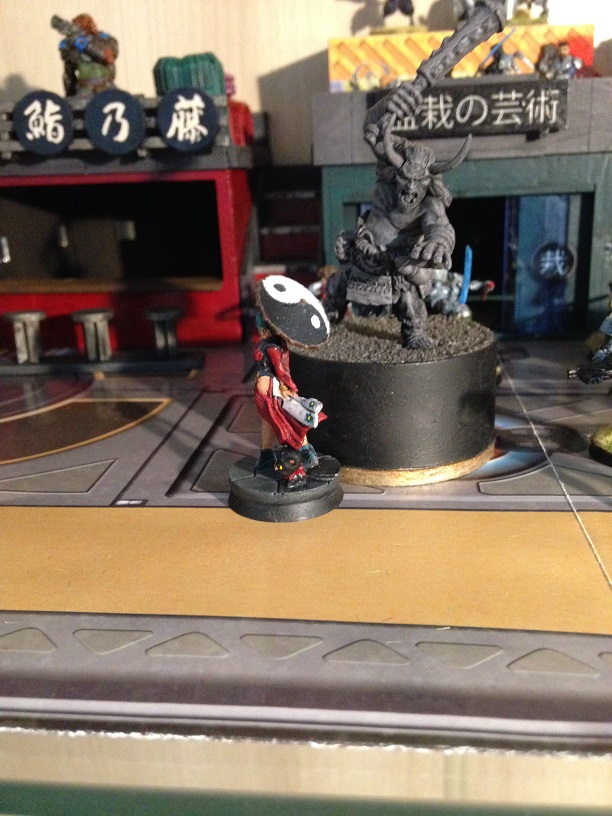
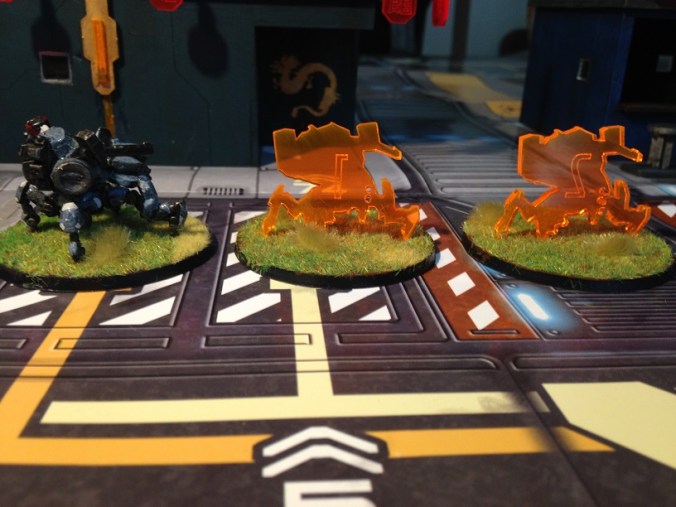
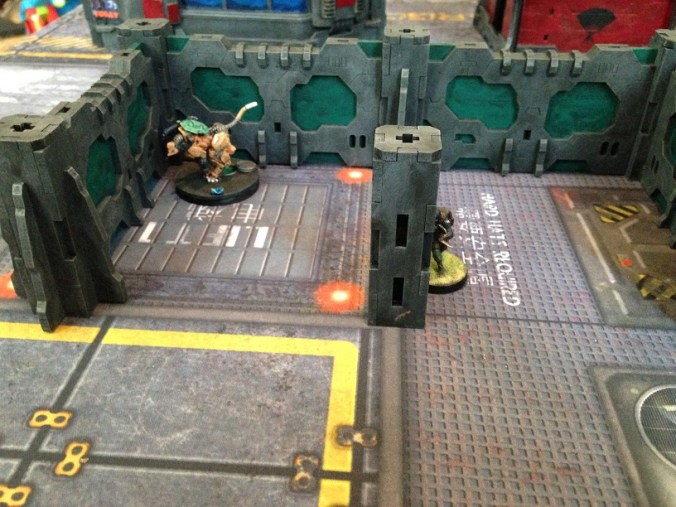
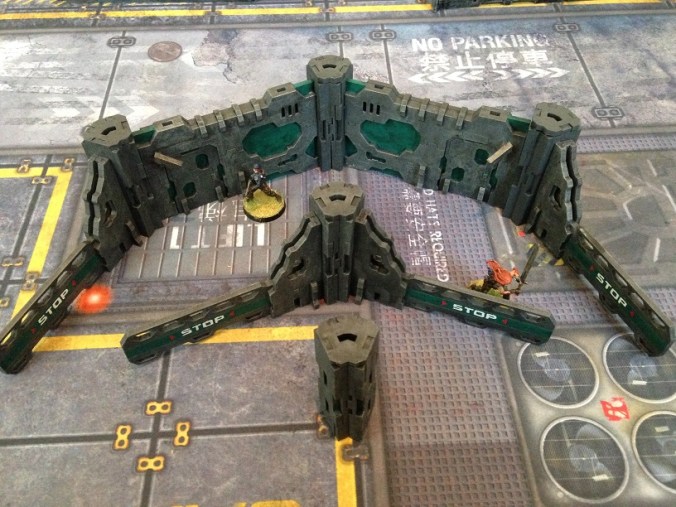
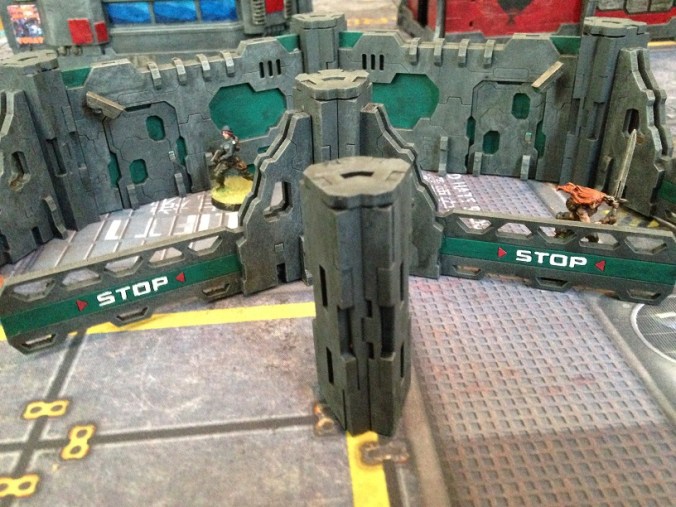
Each Silhouette can come with it’s own base, and in the case of the Holo Echoes I actually recommend using them, as they come with nice Hex Counters on the base that allow you to always know who the real one is, and who isn’t….which can be very important in tournaments and more hard fought battles.

IMG_20160928_173107.jpg

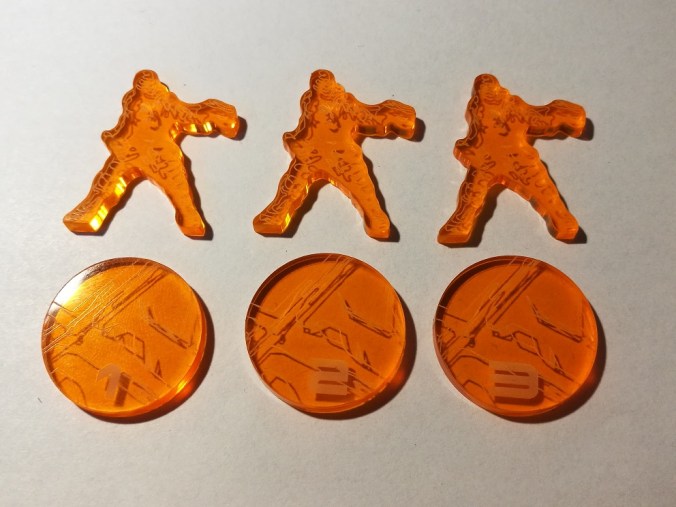
My Kanren Bases actually came with Numbers instead of Hex Counters, but after taking a look at their website it seems they have changed that now to streamline it a bit more, and I have to say, I prefer the Hex Counters over the numbers.

IMG_20160928_175852.jpg

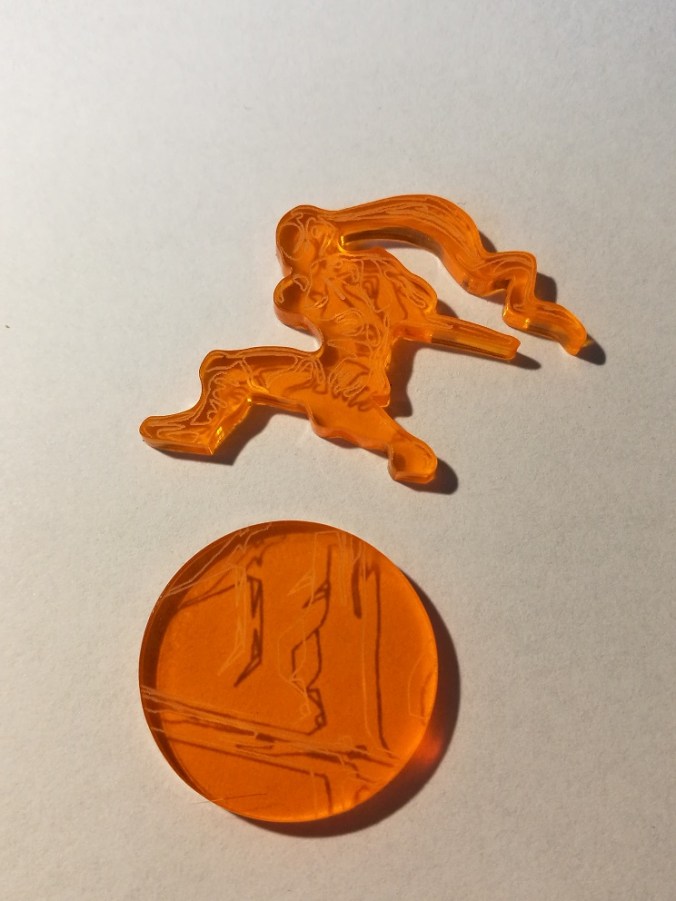
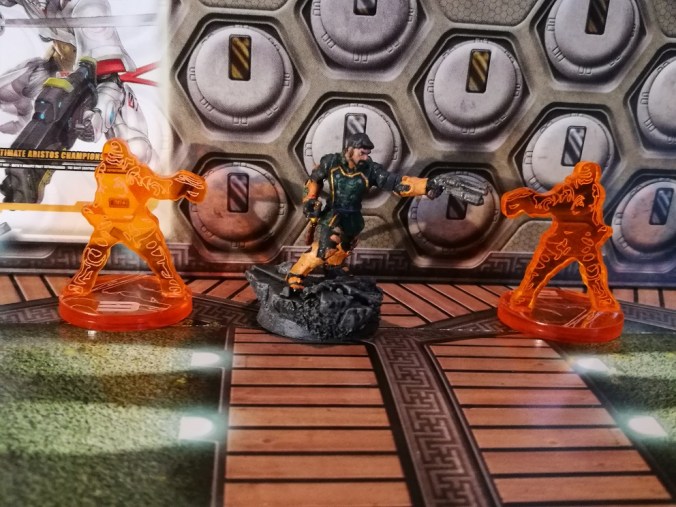
In my test package one of the Silhouettes always was mirrored, looking into the opposite direction, and frankly I found that a bit odd since it actually wasn’t possible to make the model look that way, since the weapons are on fixed positions and the mirroring swapped those., but once again Every Little War has already noticed that, and I was assured by the guys that in the finished product all Holo Echoes will look in the same direction to avoid this problem.

IMG_20160928_180320.jpg

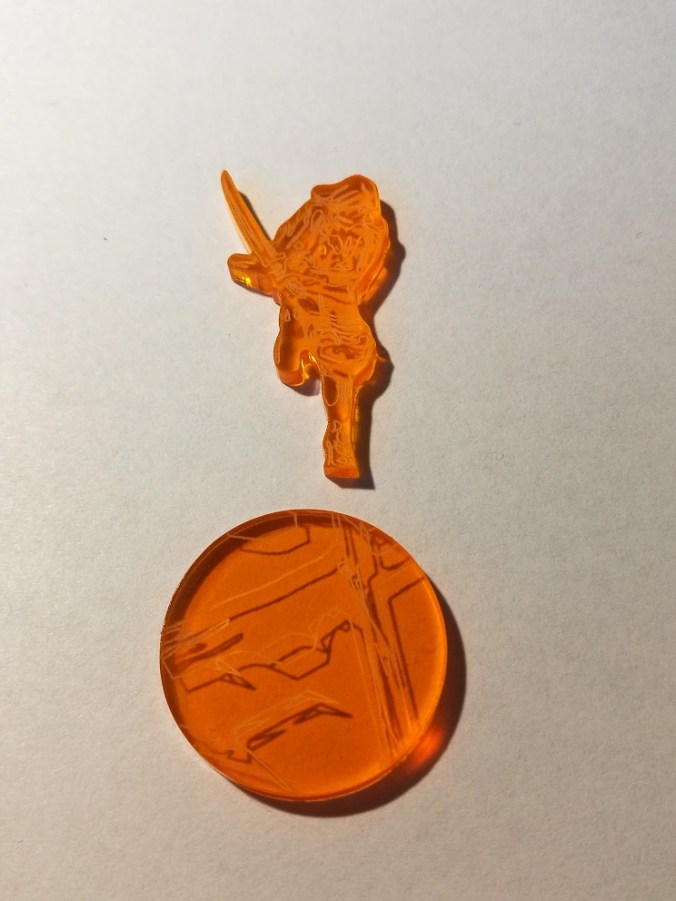
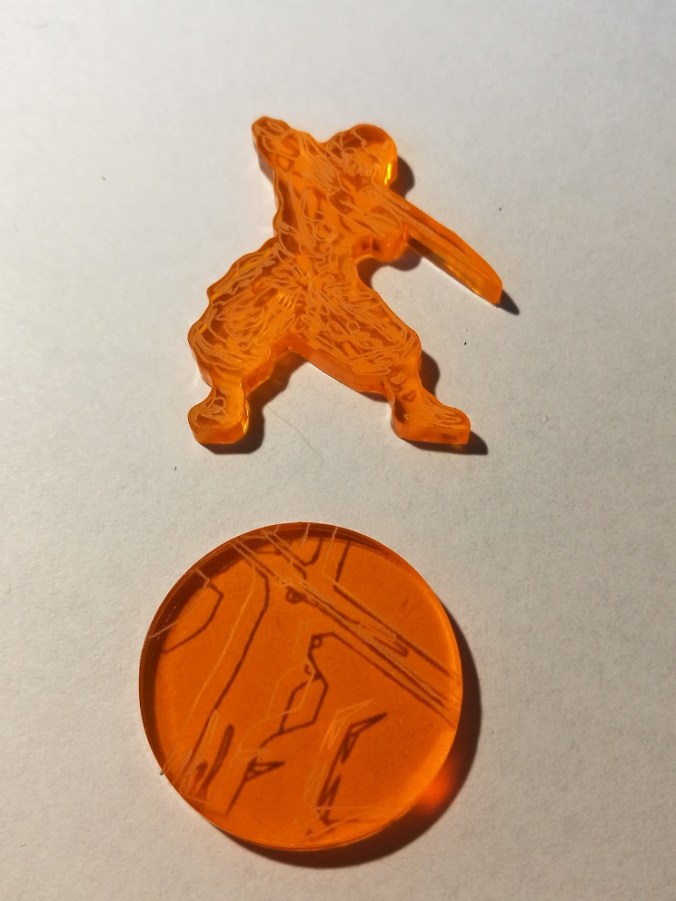
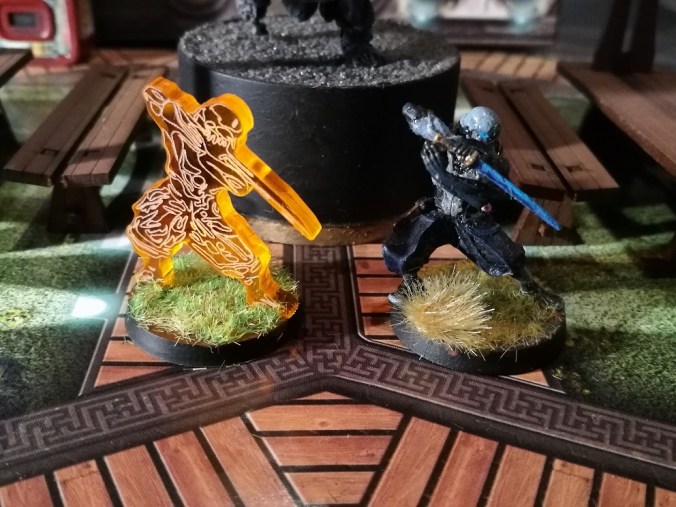
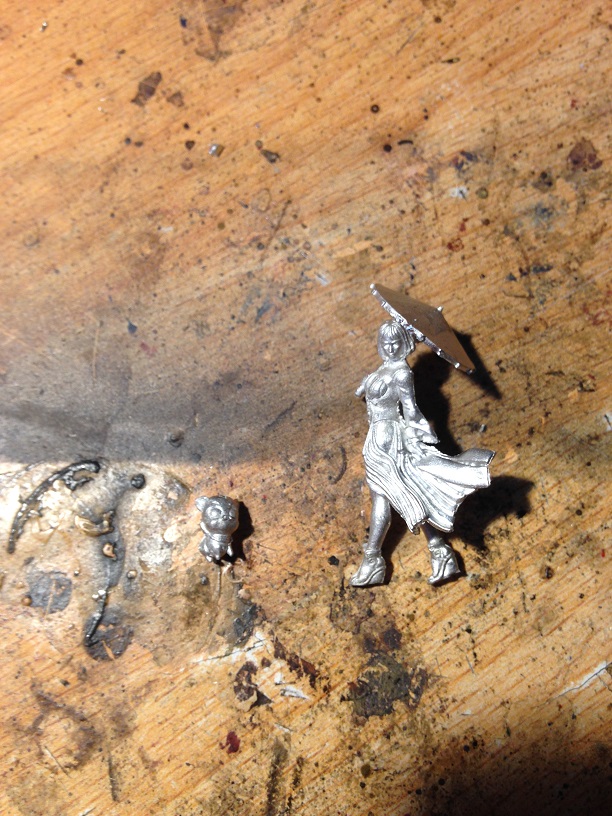
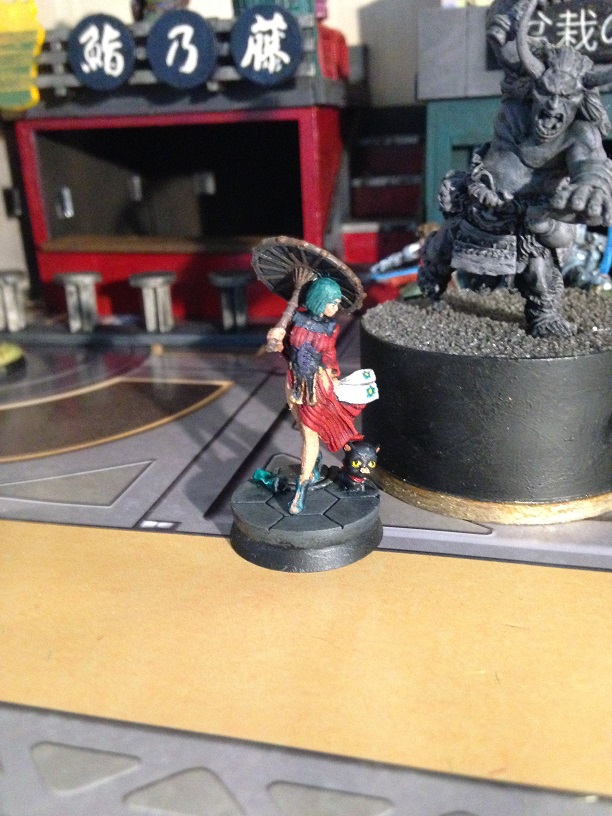
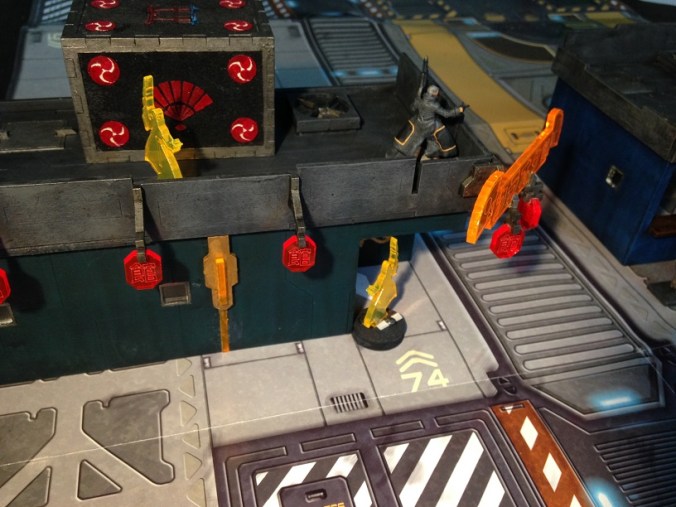
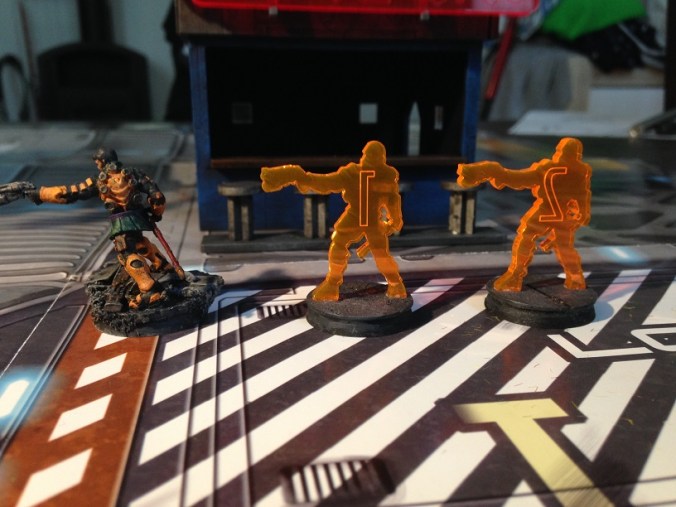
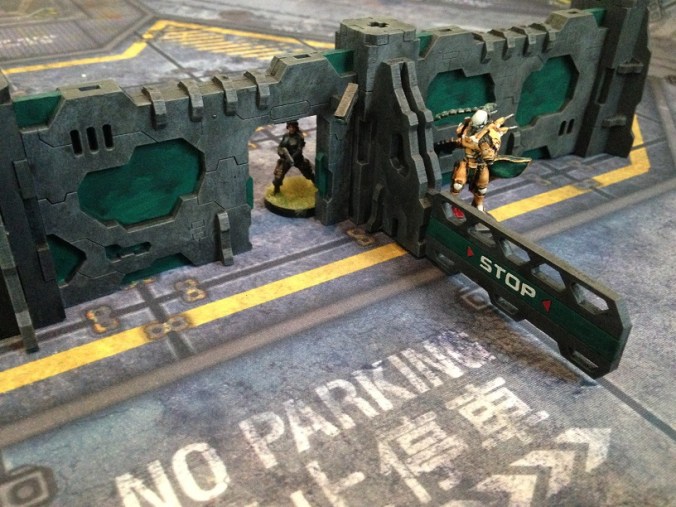
The size of the Holo Echoes fits the original models very well, and I think they actually look great together, although I think the outlines on Sforza and the Lu Duan turned out a bit better than the Kanren…

IMG_20160928_180051.jpg

M_-_Sforza_large (1).jpg

(Sforza Image from Every Little War)

Because the Kanren’s chest seems a bit too empty for my taste, especially since the Kanren has this nice flap over shirt on which I am sure could have looked interesting as an outline.

IMG_20160928_180505.jpg


IMG_20160928_180703.jpg

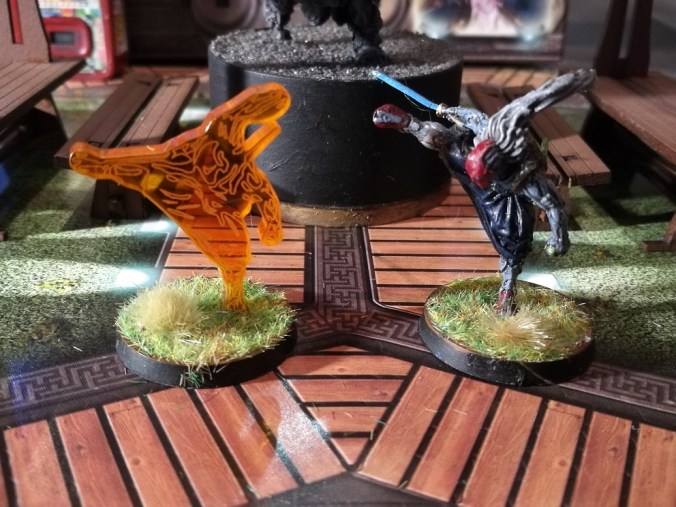
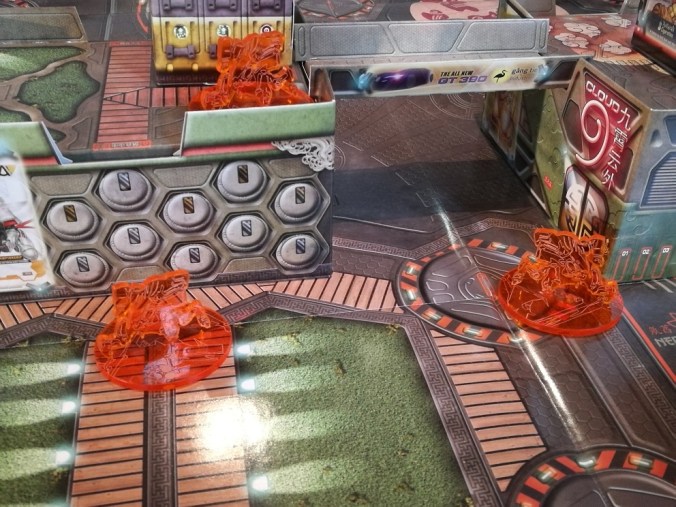
All in all I will say that I like the Holo Echoes a lot, and I think they are a bit more playable than the normal Camo/TO Camo Silhouettes in the Set, as you don’t have to worry about giving away the model when using Holo Echoes…unless you go for that turn 1 Holoemitter 1&2 Trickery ;-P

I think they could have improved the Kanren a bit more, and I am missing the stretched out hand pose I have seen on other Holo Echoes and the model itself (from an angle it just doesn’t look as cool, although I can see why they did it..), but they did an awesome job on the Lu Duan and Father Sforza for sure!

Since I gave the other Holo Echoes a quite high rating, and these Holo Echoes are actually even better than them, I shall give them a 9.5/10. A little bit of extra work could go into the outlines of the Silhouettes, but other than that they give you everything you could ever want from a Holo Echo Marker, and then some more (like a boatload of colours to choose from, and very flexible bundles!)

I recommend them full heartedly to every Yu Jing player that wants some nice Holo Echoes for their evil trickster units!


Every Little War Review Part 1: Introduction & Ninja Silhouettes

Hello Everyone,

Recently after posting some of my previous Reviews,  the Guys from “Every Little War”  ( https://everylittlewar.com/ ), contacted me and asked if I was interested in reviewing some of their upcomming products as well,  as they apparently liked the style of my other Reviews.

Since they agreed to my condition that I could rate the Stuff however I liked/disliked it, and I am always up for getting more potentially awesome stuff, I ended up agreeing!


They wouldn’t tell me what I was about to get exactly, so I waited patiently like a little child around christmas (so with no patience at all, and a lot of “Do you think it will be here today?” to my wife…)  for whatever was going to come my way, and after a while I finally came back from work to find this lovely box on my table: (Miniature not included, only added for scale)

IMG_20160923_130847.jpg

After making sure that my son was fully distracted and wouldn’t come around to plunder my booty, I opened it up and found the following inside:

cof

Which upon further inspection turned out to be:

IMG_20160923_132037_1.jpg

A full Set of Yu Jing Camo/Holo Markers! (at least to my knowledge, since I don’t play Vanilla Yu Jing yet I might have missed one there?)

At the time I am writing this the Set is not available yet, but I talked to the Guys and they assured me that it will be available very soon, and that they also will have many other Silhouettes from other factions and in different colours, with the goal obviously being to have them all available in the near future.

Every Little War is a company that produces and sells their products from America, and these particular Silhouettes have been created by Osman Naskali, and you will be able to order them from this link once they are available:

Osman Naskali

So without further ado…I present to you Part 1 of my Review, all the Ninja Silhouettes that Every Little War will soon have available.

mdemdemde


Obviously there are no Ninjas in the Yu Jing State Empire, so this whole Blog Entry is just make believe and folklore….but just in case you are interested in such archaic stories anyways, here are some closeups of said “Ninjas”…

(Please excuse some of my bad paintjobs on the older ninjas, they where one of the first Infinity Miniatures I painted ;-P)

Ninja with Tactical Bow:

IMG_20160928_184447.jpg

(Sorry I forgot to take a white background picture of this one before I added it to the base, I got too excited!!)

Shinobu Kitsune:

cofmde

Oniwaban:

IMG_20160928_172851.jpg


cof


Ninja Sniper:

cofmde

Ninja Hacker:

cof


cof


Ninja: (Don’t have the Model)

cof

IMG_20160928_185015.jpg

Saito Togane: (Damn, no white background picture either, damn sneaky Ninjas!!)

IMG_20160928_184944.jpg


Raiden: (Wait, what? That’s not even a ninja is it? Oh screw it…with a name like that it’s alright I guess…and no white background again! Sneaky gits!)

mde

Apparently that Raiden also brought some friends, some of which don’t even have models yet if I am not mistaken!

mde


So, as you can see the silhouettes come with their own bases (which actually look quite stylish I must say!) and the have the outlines of the actual figures on them, which is something that I actually thought was missing in my Review of other Silhouettes before.

After seeing these Silhouettes I think I was right in assuming that outlines like that would make the Silhouettes look even more awesome, or what do you think?

The Silhouettes themselves come very clean with a protective layer on the backside, and are easy to put together, even on scenic bases as you can see in the pictures.

Some of the outlines turned out a bit better than others (the normal Ninja one looks a bit clunky, but so does the whole model i think, while the Bow Ninja just looks stunning!)

I also found two small things that I found a bit odd, one being the Ninja Sniper, who’s Silhouette seems to be quite a bit bigger than the actual model.

mde

The other one being that the Saito Togane Silhouette at first appeared to not have the Katana arm…IMG_20160928_184944.jpg

but that  turned out to be because of the perspective in which the Silhouette was made, and if you look very closely you can actually see the Katana and the arm.


Overall I would give these Silhouettes a 9.5/10. They could have been a 10, but the difference in outline “quality” (even though that’s very subjective), size on the Ninja Sniper and the fact that while I was writing this review I actually came up with a way to improve them even further, mean it ended up as a 9.5

Those are definitely the best Silhouettes I have seen out there so far, and I recommend them to everyone that thinks about getting Silhouettes for their Camo Units!

The only way I could see them improved, would be to change the Bases that these come with, into bases that actually show the “TO Camo” “Camo” Symbol on the base! (or something along those lines if they are not allowed to use the official symbols) That way people could instantly see the different types of Camo as well as the lovely silhouette…..but again, that’s just my personal opinion, though if anyone wants to steal my idea, feel free to do so ;-P


Corvus Belli Miniature Review: Wu Ming

Hello Everyone!

I recently bought the new Wu Ming miniatures, and since it’s quite the new set, I thought, why not make a small review about it?

IMG_1722

As usual in their recent sets the Wu Ming come with 2 x 2 sets of different upper bodies, and 4 unique pairs of arms and 4 heads to fit them.

IMG_1725

The set also comes with a seperate SMG which can be attached to any model you want, or maybe even be used for a different model if you want to.

The parts go together very easily and I didn’t have any problems with assembling them, although the arms seem a bit flimsy at the joints for some reason.

IMG_1740.JPGIMG_1742.JPGIMG_1745.JPG

I am a bit sad that this set doesn’t include the Combo/Multi rifle weapon option as that seems to be one of the better options of the Wu Mings, but the box is still quite awesome I must say.

Painted and Assembled Wu Ming:IMG_20160819_190451.jpgIMG_20160819_190436.jpgIMG_20160819_190510.jpgIMG_20160819_190526.jpgIMG_20160819_190541.jpgIMG_20160819_190413.jpg

Please excuse my not so great painting job on them, I’m sure most of you will be able to do them better justice, but I am happy enough with the result and I think they look awesome and very intimidating on the table!

The helmetless one especially looks very threatening and has a very Bane like appearance.


Overall I’ll give this set a 8 out of 10. It’s a very nice set, but the missing Combo/Multirifle option really is a bummer. The additional SMG is a very nice tough however and might help people with conversion work on other models.

As with all recent Corvus Belli Boxes that I have had i would have much prefered for there to be 4 seperate bodies though….sure the arms and heads make each model look unique, but still it seems a bit lazy, and with only 4 models in the box, having each one look unique should be possible.

It is however an obvious recommendation for all ISS players. All weapon options except combi/Mulit rifle are present, and they look way more unique than the old Wu Ming I think, and they definitely make a statement on the board when you place them.

Antenocitis Workshop Review Part 2 : Happy Panda Noodles

Hello Everyone!

In Part 2 (and currently the last part) of my Antenocitis Workshop Order Review we’ll be taking a look at the building I had wanted to order for over a year now, and finally got around to order. The Happy Panda Noodles Restaurant!

Happy Panda Noodles

IMG_1824

I can’t say anything about delivery times because I ordered the building from a german distributor since that turned out to be cheaper with the pound to euro conversion and some very weird calculation problems I had on the Antenocitis Workshop Page (The normal price already included tax, then it added tax again, and then on my paypal payment site it wanted to add tax again! making everything cost almost double the original price in the end……maybe it’s some problem with where I order from (Austria) or with the conversion itself or whatever, or maybe I was just experiencing some weird bug.)

The Building comes with pre painted MDF and at first I was quite surprised when I opened the box, as some of the white parts (mostly the Panda itself) seemed VERY burned, to the point where I assumed they had some sort of production error or old laser lense…

IMG_1825

But after reading the very detailed and informative instructions (which sadly were missing the last page for me..), it turned out that the white parts actually come with a protective sheet on them, and once you pull that off the MDF is beautifully white behind it.

IMG_1842.JPG

Getting the sheet off can be a bit tricky for some parts, and I often used the back of my hobby knife to gently scrap it off, which yielded good results.

When assembling this kit I recommend you take extra time to very carefully read the instructions, and make extra sure to assemble the basic structure of the building properly.

IMG_1827

If, like me, you don’t notice a slight bend in one of the slot in parts, you won’t notice this right away, but once you come to the later steps, you’ll suddenly be faced with something like this:

IMG_1843

And it will be waaaaay to late to do anything about it because ripping the wall off will do terrible damage to the pre painted part of it, forcing you to repair and repaint it (if you even happen to have that specific colour of red around, which I didn’t…)

The round front part of the building slots in and fits surprisingly good and isn’t fragile at all as I first feared it would be, a very smart design choice there I must say! (Note that this part comes with a protective sheet on BOTH sides!)

IMG_1844.JPG

Now it was at this part that I did the biggest error in my construction of this kit. I was so focused on making the roof section fit properly, that I didn’t notice a big error I was making while attaching the white parts of the side decorations.

On the front and the side everything looked fine, but as I turned (after a little time skip due to family distractions ;-P) to the back, I realized the terrible mistake I had made, and also had to realize that I no longer could fix it without brutally damaging the roof sections of the building……I had glued on the white parts too high…

IMG_1920

IMG_1921.JPG

(This part of the building shows signs of another metal grey bit with neon lights that should be added here, however this part wasn’t included in my set and the neon light stick was too short to fill the part as well if it would have been included…so maybe this is a leftover from their design process, or an alternative position.)

Now this is not the end of the world for this building, everything still fits together nicely and looks good in the end, but I was still very annoyed by my own carelessness, and so I hope this Review can prevent others from making the same stupid oversight.

Now as mentioned before this lovely product comes with already pre painted MDF and metal grey plastic/resin parts, which means that unless you really want to, there is actually no painting required.

Still I couldn’t stand having metalic grey products standing around in the interior of the building (yes this thing actually comes with interior!), so I ended up painting all the plastic/resin parts in the end anyways.

(As always, Miniatures not included and only added for scale)

Assembled (wrong) and Painted Happy Panda Noodles:

IMG_2040IMG_2041IMG_2043.JPGIMG_2045.JPGIMG_2048.JPGIMG_2050IMG_2052IMG_2056IMG_2058IMG_2059

Everything looks quite awesome once assembled, and I absolutely LOVE the interior details and the way the doors where made (they swing opend and closed very easily), but as the last picture indicates, i have had a BIG problem with these 3 parts of the interior.

I don’t know if it’s because I screwed up at assembly somewhere, or if the mold was faulty or I really was supposed to do what I had to, but for me the three pieces where too big and too tall to fit into their designated spot, and trying to cram them in instantly popped the side out of the building or wouldn’t allow for the top to fit in smoothly.

So I had to cut away several layers of plastic/resin from these pieces to actually make them fit in, which not only required a lot of work, but obviously took away from their looks as well. (and I kind of messed up by cutting away from one at the top because it seemed the best part, only to notice that the other one had packages at that spot, forcing me to cut away at the bottom…).

Another part that was annoying me a bit was the fact that this lovely building, which even includes an interior, for some unknown reason does NOT include a floor! Why? Whyyyy??? The entrances even have a little step which would have made adding a floor very easy, and the interior basically screams for a floor, but nope, non included, and now every picture I take of the interior shows the outside floor….


So yeah, this turned out to be a very complicated construction process for me, and to some degree I am not sure whether that wass due to my own errors, or design/mold flaws.

However I will give the Happy Panda Noodles Restaurant a 9 out of 10. It is almost perfect, and if it were not for the not fitting interior pieces and the missing floor, this would have been an easy 10, but no floor in a building like that is actually a huge deal for me, and having to cut apart stuff to make it fit is quite troublesome for assembly.

I do however recommend the Happy Panda Noodles Restaurant for every Infinity player, no matter the board you are intending. This cheeky Panda (my wife keeps insisting that it looks like a cat pretending to be a Panda) could easily sneak one of it’s branches into the bloody desert, or an icy mountain top if you ask me, and it will greatly enchance any table you place it on I think.and  I can’t wait to play my first game with it on the table!


TTCombat Terrain Review Part 2 : Oriental Bridge and Lanterns

Hello Everyone!

In Part 2 of my TTCombat Terrain Order Review we’ll take a look at the Oriental Bridge and Lanterns set.

Oriental bridge and Lanterns

Just as with Part 1 the package arrived within 2 weeks and came in a nice perfect fit envelope.

IMG_1789IMG_1791

The Sprues themselves come wrapped in plastic and come with a nice picture of the product on the front, and the instructions on the back.

24

This set comes with a lot of thin cardboard pieces which can be a bit tricky to cut out without damaging, but the only really troublesome part of assembly were the Lanterns, since most of the fiddly bits there were made out of the cardboard, and they easily get lose, don’t fit as tightly as you’d want to, and it’s easy to rip little pieces off if you get glue on your fingers, which can easily happen while trying to fiddle the thing together.

The Bridge on the other side goes together very easily and looks great with the carboard details on the side.

IMG_1803.JPGIMG_1804.JPG

I think I was hoping for more with the lanterns, as they just don’t fit together as well as I wanted them too, but the bridges are awesome and look very authentic, and the lanterns can be forgiven when considering that the original japanese stone lanterns often look very crude as well.

IMG_2065.JPGIMG_2061IMG_2063

The details on the side of the bridge don’t show that good with my traditional painting sceme, but the sides are slightly thicker thanks to that and I really like the bridges.

It seems I either messed up during assembly or they got warped due to some sort of pressure in the meantime, but one of my bridges ended up slightly angled and doesn’t stand completely flat anymore.


As with all my TTCombat Terrain Reviews I’ll also split this one into two categories:

For Infinity I’ll give this one a 5/10, it’s easy to assemble and the bridge looks nice once painted, but the lanterns just don’t fit for Infinity and just look too crude and boring for the Infinity Universe I think, and due to the bridges design it doesn’t work as bridges between buildings with most building designs (which was what I had originally thought of using them as), but if you want to build some island of tranquility within a japanese themed area of your Tabletop, it might work out well.

Thus for Infinity I can only recommend this set for those who want to build a traditional japanese styled area on their table, it really doesn’t fit into any futuristic areas and isn’t compatible with most terrain like that.

IMG_2079.JPG


For other more traditional medieval japanese style games I’ll give this set a 7/10. It looks very traditional, the bridge goes together nicely and looks good, and in a medieval setting the crude looks of the lanterns can be forgiven more easily than in Infinity I think. I still would have prefered for the lanterns to be made completely out of mdf though, as I don’t think they’ll survive for very long without losing parts. I’m sure this set would look great in some sort of Temple Garden.

Once again I’ve got to say that the price of this terrain set is still very nice though, and if you are on a budget it’s well worth it I think.

TTCombat Terrain Review Part 1 : Torii Gates

Hello Everyone!

Recently someone posted a nice little Review of a japanese style hut from TTCombat, and as I took a look at their site and noticed the prices of the terrain….I just couldn’t resist and ordered all of their Eastern Empire Scenics Terrain stuff!

In this part of the Review of this Order, I will take a look at the Torii Gates.

Torii Gates

The package arrived within 2 weeks and came in a perfect fit package.

IMG_1789.JPGIMG_1791.JPG

The Torii Gates sprues themselves come in a plastic foil with a nice picture on the front, and the instructions on the back.

1.jpg3.jpg

As you can see, assembly of the gates is easy enough, with the hardest parts most likely being fitting the 3 top sections together without too much of a gap, and adding the thick cardboard roof on top.

Yes you read that right, the roof is made of rather thick cardboard, which works very well, but forces you to be VERY careful with your glue, less you rip parts of it off with your sticky fingers or so.

IMG_1799.JPGIMG_1800.JPGIMG_1802.JPG

I am not too big a fan of the rounded “bases” of the Torii as it’s kind of at odds with the rest of the design, but that’s just a minor thing really.

(As always, miniatures not included and only added for scale comparison)

Painted Torii Gates:

IMG_2073.JPGIMG_2075.JPGIMG_2077.JPG

I keept the painting scheme simple as real Toriis in Japan are kept very simple as well (most of the time…), and I really like that style.

I didn’t have time to play a game with them yet, but I think the Torii fit to scale very well (for big Torii anyways) and they look great on the table!

(Sorry for the lower quality of this picture)

Toriiinaction.jpg

Obviously they’d fit into a traditional medieval setting slightly better, but they work just fine for Infinity as well I think.


I’ll split my Review for the TTCombat Terrain into two parts, one for Infinity, and one for the Kit itself.

For Infinity I’ll give this kit a 7/10, it’s easy to build, looks nice and does it’s job, but for Infinity this could have done in way more stylish ways, with Neon signs or whatnot (some Torii have signs on the middle part for example), but if you are going for a more traditional feel (like I did) this is still a very good kit and I’d recommend it for your asian style Infinity Table any day. If you are on a budget this might even be a 8/10 because of the sweet price 🙂

For a more traditional japanese medieval setting I’d give this kit a 9/10, it’s easy to build, looks nice and very authentic, and is easy to paint as well. The only thing to improve I think would be to use round poles for the Torii, I know that’s hard to make with MDF lasercutting, but when I was in Japan all Torii I saw there had round poles, and it takes away a little bit from the classic design to not have that.


Corvus Belli Miniature Review: HVT Dragon Lady

Hello Everyone!

I should have started this when I actually started with my ISS I guess, but I didn’t think about taking pictures of the boxes and unfinished models, so I decided I couldn’t do proper reviews for them.

But now that I ordered some more models for my quickly growing ISS Army it’s time to start reviewing them a little.

Today i will start with the model that will most likely be used the most in all my armies from now on….the lovely High Value Target Dragon Lady!

Dragon Lady

IMG_1728

I was surprised to see how sturdy the umbrella bits actually are and how easy the model is to assemble when considering how frail the arms and umbrella handle actually is.

IMG_1731

I do however recommend tightly securing the Dragon Ladies little pet creature (cow? pig? whatever it is…), I thought I had it savely tucked away until I’d come around to paint it, only to instantly lose it the moment I started cleaning my desk a little, and it took me 2 full on dumpster searches and another very close up desk screening to find it again (hiding in between two keys of my keyboard…little bugger!)

IMG_1754IMG_1757.JPG

The Model comes with a surprising amount of detail, from the little bands of her corsette to the little decorations on her boots, this model just begs for an awesome paint job…or in my case for a better painter.

But since I spend all my hobby money on new figures and terrain, I don’t have money for professional painting services, and no time to actually improve my skills to the level this miniature deserves….so as sorry as that is, she’ll have to deal with my level of painting ;-P

Dragon Lady Painted:

IMG_1778.JPGIMG_1782.JPGIMG_1785.JPG

She actually looks a little bit better than on the pictures, but the quality didn’t turn out too good on them.

I blatantly stole the umbrella design idea from someone named JotaGe83 who’s pictures of the Dragon Lady I found while googling for inspiration, and I think it turned out quite nicely!


I think the Dragon Lady is one of the best HVT Models of the range, and a perfect fit for Yu Jing. Het outfit is a perfect mix between classic and modern asian style and the little pet just adds to her awesomeness.

I really don’t think I should rate Infinity Figures as I am basically just a Miniature addict in full swing, but for the heck of it, I’ll give this miniature a 9,5 out of 10. The only way to make this model better would be to give her some sort of combat profile so she could go around and kick some ass instead of just standing around looking good! I think the little Pet deserves a Guardian Profile and she could easily be some sort of Pheromone wearing Geisha Assassin or whatnot ;-P

I definitely recommend this model for any Yu Jing player that wants a HVT, just give her some unique and awesome design to make her yours, as she’ll be joining you in basically every battle you’ll ever play!

Antenocitis Workshop Review Part 1: Stand Alone Vendors

Hello Everyone!

With the new month around the corner I decided to finally order some things I had wanted to order for quite a while now. Sadly I couldn’t order everything I wanted because they were out of stock at the distributor of my choice, but nevertheless I got the two most important parts.

For this Review I will focus on the first part of my order, which is the Antenocitis Workshop Stand Alone Vendors (as the title already revealed).

Stand Alone Vendors

I still needed some more fitting scatter terrain for my table, and what is more fitting for an asian city, than a bunch of vending machines? I mean really, have you been to Japan? There are 3 of those on every corner, and sometimes 8+ in a single small street, so how could I go without any for my The Neon Dragon Terrain right?

The set comes in a little blister and is as simple as it gets really, just 4 pieces of resin and 2 sheets of printed surfaces.

IMG_1824.JPG

A little bit of trimming is required as some of the Vendors might have excess Resin at the base, while others have small holes instead, most likely depending on how much material made it in the mold. But since this side is the bottom of the machine, once you cut off the excess parts you won’t see anything of it.

The Vendors are tall enough to provide full cover for Silhuette 2 Models if they hide behind the front or back, although the way you’ll usually position them they’ll most likely just give partial cover.

I was a bit surprised to find that the cover prints were actually just printed on sturdy cardboard, but if I had properly read the description I should have expected just that.

I really wonder though why they didn’t go for stickers instead, as it would seem like a really obvious and easy to use option, and I have to say cutting out the middle part on 2 of the front covers was a pain in the neck, and cutting out all the parts properly took almost as long as completely painting all 4 vendors (which only shows how sloppily I paint I guess ;-P)

Once I managed to cut them out and added a little hardcoat to them to make them shine a little bit, I think they do look quite awesome!

(As always, Models not included and only added for scale..)

Stand Alone Vendors Assembled & Painted:

IMG_1828.JPGIMG_1829.JPGIMG_1830.JPGIMG_1833.JPGIMG_1835.JPG


All in all I think this little set is nice for the price, but it is really as simple as it gets, and a little bit too simple maybe. Making each printout unique wouldn’t have killed them and would have added more variety if one would order more than one set, and that the printouts aren’t easy to use stickers is kind of a bummer.

I do however love that the printouts were done in chinese/japanese as it fits perfectly for my Yu Jing themed board, however if you are not a Yu Jing player it makes the set a bit harder to recommend.


I’ll give this set a 6,5, it could be improved by adding different designs, by making the printouts stickers, maybe by adding some neon parts to it, and maybe even adding more different vendor designs  to make using more than one set more compelling (maybe something different than drinks? How about a gun Vendor, or whatnot, there are a lot of crazy vending machines in asia already, and I’m sure in Yu Jing the craziness would just increase!), but I’d still recommend it to anyone who wants some cheap nice looking stylish scatter terrain, even more so if you are building a Yu Jing themed board.

Customeeple Review Part 6: Yu Jing Holoechoes

Hello Everyone,

As the currently last part of my Customeeple Review I’ll be taking a short look at the Yu Jing Holoechoes I ordered for the current Models I have.

Sforza Holoechoes

Yaoxie Lu Duan Holoechoes

Kanren Holoechoes

The Holoechoes come in small plastic zip bags with a little description paper (which shows you the ocntent of the package), 2 Holoechoes and 2 fitting bases for the Echoes. (In case of the Lu Duan Echoes I got to choose which size of Bases I wanted to have)

Package.jpg

Assembly is obviously easy, as it just consists of glueing the Echoes on the base, but since I used Resin Bases fitting to my other ISS Models for some of them, I can say that they work with most of them as well.

The size of the Holo Echoes fits the model perfectly, the only slight exception being the Lu Duan where the silhuette seems to have been taken from a slight angle, which makes it look a bit odd when standing next to each other, but is no problem in the game.

(Miniatures and Resin Bases not included and only added for scale and cool looks)

Assembled Sforza Holoechoes:

IMG_1629.JPGIMG_1631.JPGIMG_1635.JPG

Assembled Lu Duan Holoechoes:

IMG_1648.JPGIMG_1650.JPGIMG_1651.JPG

Assembled Kanren Holoechoes:

IMG_1637.JPGIMG_1640.JPGIMG_1642.JPG

All together:

IMG_1653.JPG

The Echoes are very playable and look quite good. I am a bit scared of the Sforza Echoes loosing their stretched out finger, but it definitely needed to be there otherwise they’d only look half as cool ;-P

I’ll give these sets a 9/10, I think they do what they where supposed to do almost perfectly, and I think the only way to improve them a little would be by adding a slight outline of the figure on the Echo itself, but that’s just my personal preference.

Micro Art Studio Review Part 2: District 5 Walls Straight & Gates

Hello Everyone,

Since I am currently madly collecting all sorts of awesome terrain to make my Tabletop look better, I couldn’t resist grabbing the following pieces of terrain as I saw them stocked in my local hobby shop:

District 5 Walls Straight

District 5 Walls Gates

I sadly don’t have any nice pictures of the packages or the unassembled or unpainted parts of these sets as I snuck this purchase past my Wife and secretly assembled and sprayed them in the dark of the night, while letting all the evidence of their “newness” vanish into a trashbag that I whisked away the next morning…….

Luckily my wife pretended as if nothing had happened when the next day suddenly a chinese wall  was standing on my desk, waiting to be painted  ;-P

The Kits come wrapped in foil and include a nice and detailed instruction sheet.

Micro Art Studio defnitely make some of the best instruction sheets for their products and I had no problem whatsoever assembling them according to the instruction sheet.

I couldn’t see anything like a downloadable version of these instruction sheets, but maybe I just didn’t find them.

Assembly of the wall segments is easy enough, the only real difficult parts being the sloped corner segments of the gate set, as well as the little bar used to make the door movable (which I was afraid would end up gluing the gate shut or breaking, but none of which happened).

(Once again, miniatures not included and only added for scale)

District 5 Wall Straight Painted:

IMG_1588.JPGIMG_1592IMG_1593.JPGIMG_1596.JPG

District 5 Wall Gates Painted:

IMG_1602.JPGIMG_1604.JPGIMG_1606


District 5 Walls Painted Mixed:

IMG_1608.JPGIMG_1609.JPGIMG_1612.JPG

Painting these walls was surprisingly easy, and the parts are very adaptable and sturdy.

I love little touches like the security cameras at the small wall gates, or the keypad to actually open the doors.

I would however have prefered for both sides of the actual gates to show the “STOP” (although I know that’s harder to produce, and it makes sense to only see it from the direction you are driving from..) as the side without it just looks a bit bland in comparison.

And I would have liked to see slightly bigger free areas on the walls I think. I like the fact that it looks kind of hich techy, but Micro Art Studio has some incredibly awesome Wall Tattoos, and the fact that none of them actually fit those walls is a bit of a bummer.


All together however these kits are quite awesome, and I’ll give them a 8.5/10.

I would recommend them for any Infinity Player that wants a huge Table seperator like  walls, I would however recommend to buy at least both sets together, maybe even an additional set of straight walls, as the gates only come with sloped seperators that just aren’t that useful when building a wall on most tables, and the Straight Pack alone doesn’t have any doors in the wall, making them very hard to pass through.